

GEOFF ORBELL
When taking skin biopsies for alopecic conditions in animals, there are a few key points that can improve your chances of a diagnostic biopsy.
The most important factor for alopecic skin biopsies is being able to determine the orientation of the hair follicles as we need to assess the entire length of the follicle to determine where the problem is occurring.
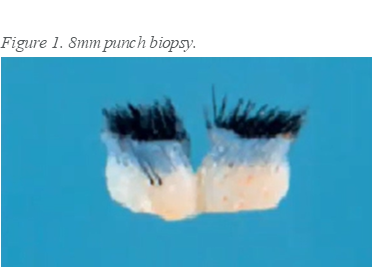
1. Take 8mm punch biopsies
This allows us to bisect the biopsy along the direction of hair growth for optimal sectioning (Figure 1).
2. Biopsy the centre of alopecic areas, not the margin
Animal hair follicles are angled to trap air for insulation, therefore biopsies taken from the margin of alopecic/haired skin might include actively growing hair bulbs from adjacent normal skin that might mislead the pathologist.
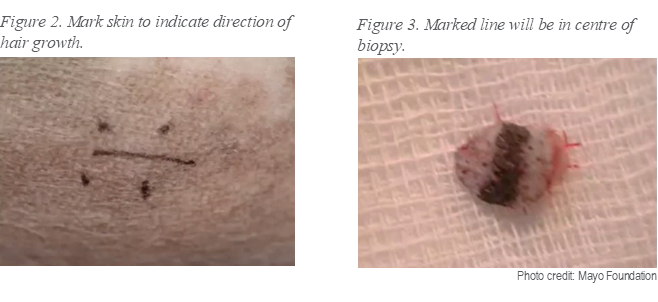
3. Draw a line/arrow on the skin to be biopsied
Understandably when there are no hairs in the biopsy, it is pretty hard for us to orientate the biopsies correctly for sectioning.
> Use a narrow-nib permanent marker e.g. Sharpie, to indicate the direction of hair growth (Figure 2).
> If done correctly, the line will appear in the centre of your biopsy (Figure 3).
4. Don’t surgically scrub biopsy sites
As with all skin biopsies, scrubbing can remove scale and crusts which can be useful histologically.
5. Use a new skin punch
In alopecic conditions the skin can often be quite fragile, therefore using a new biopsy punch in every patient will minimise the chance of any shearing artefacts on histology.
6. Elevate the biopsy from underneath
Often the punch biopsy remains attached to the patient. In alopecic areas there are no hairs to grab to pull the biopsy out and the temptation is to use rat tooth forceps to grab the biopsy. This causes a crush artefact seen histologically which can render the biopsy useless
> Avoid this by elevating the biopsy from underneath using closed curved forceps, a dental probe or needle.